Animating characters with Mixamo | Part 2 | Uploading to Mixamo
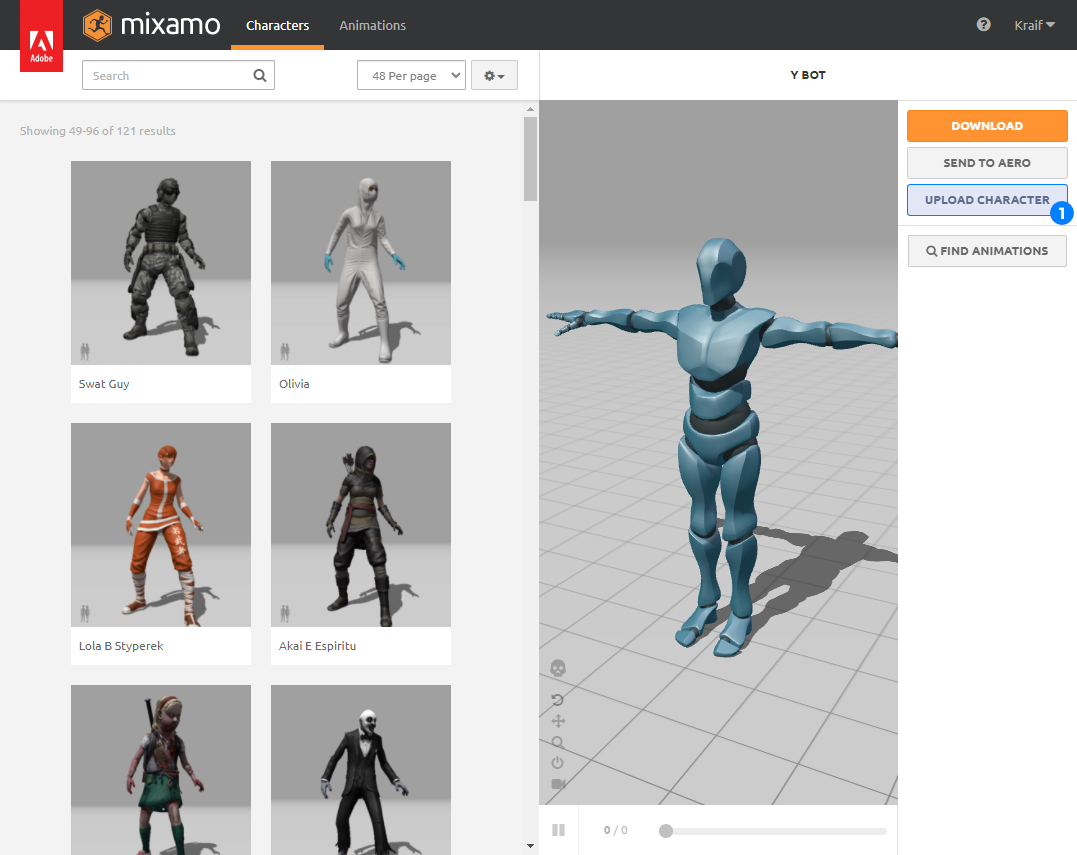
With our character model ready, lets go to mixamo.com (you will need an Adobe account, but do not worry, Mixamo is free) and click the "Upload Character" button (1) on the right.

In the dialog that opens simply click "Select character file" and select the
OBJ file or drag and drop it into the designated area.

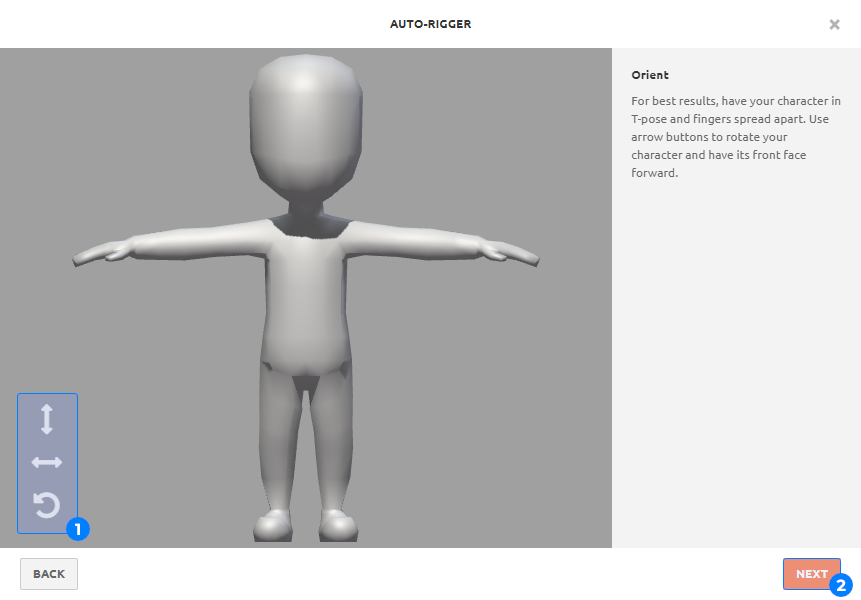
When the file finishes uploading an "auto-rigger" window opens. Here you can use the arrows on the bottom left (1) to orient the character model so it stands upright and it is looking towards you. When you have that done, click the "Next" button (2).

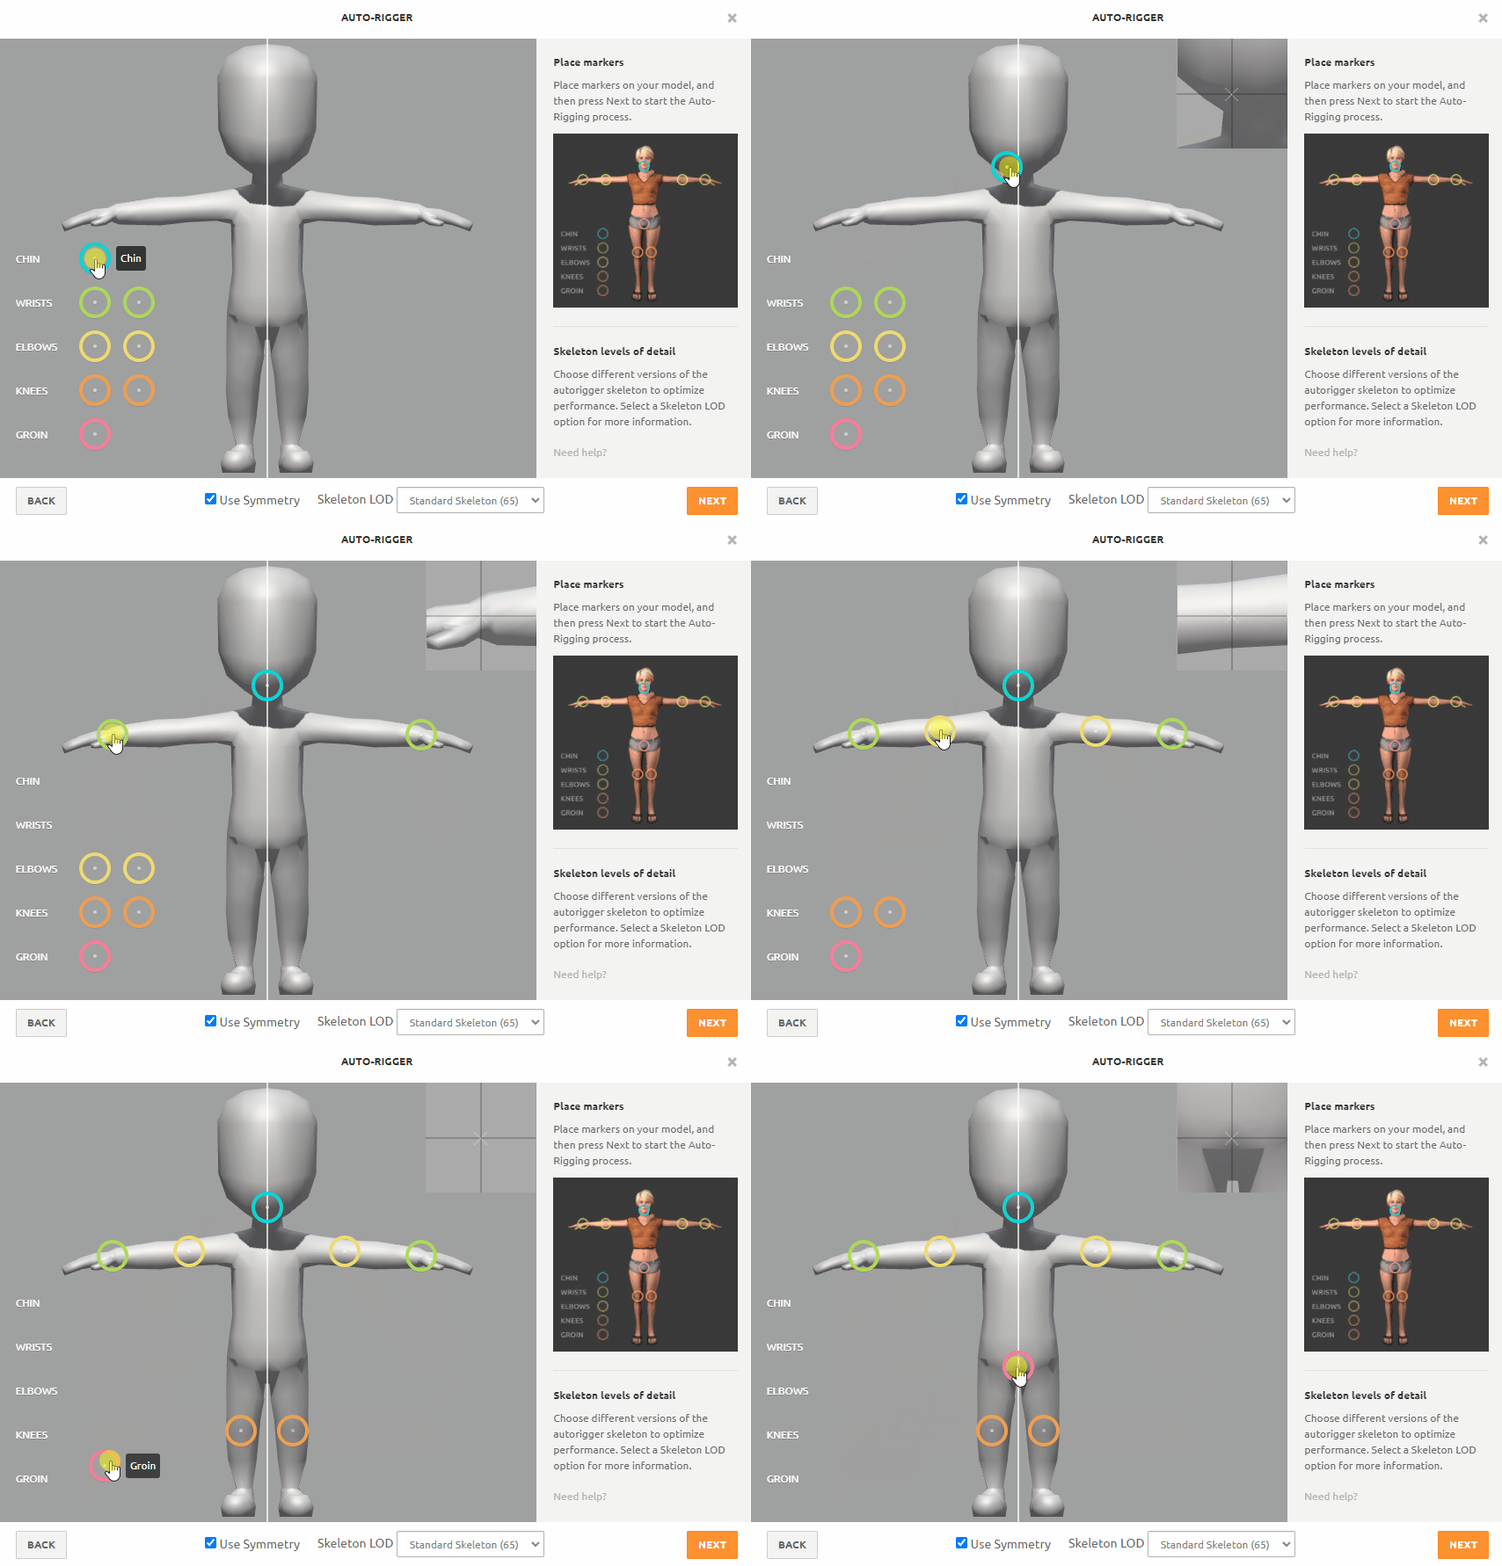
On the next screen, you need to drag markers for chin, wrists, elbows etc. onto your model.

At the bottom of the window you can also configure the number of bones used for
the character using the "Skeleton LOD" dropdown (1). The less you have the better
the performance of your game will be, especially if you want to have many
animated characters at once. The last option No Fingers (25) is useful only in
case your character does not have hands with fingers, or if the fingers are
already posed (e.g. wrapped into a fist). In our case we will be using the
2 Chain Fingers (41) option. If you would like to learn more about individual
options, simply select the one you are interested in and a detailed description
will appear on the right side of the window (2). When you are finished configuring
the rig, click the "Next" button (3).

When you click the "Next" button an auto-rigging process will start. At the end of it you should see your animated character. If everything looks alright, just keep clicking "Next" until the window closes. Or you can click the "Back" button to return to the previous screen, adjust the settings and then run the auto-rigging again.
