Animating characters with Mixamo | Part 3 | Combining multiple animations
Our character model is now rigged and we can start searching for animations that we would like to use. Once we have all of them, we can combine them into a single file in Blender.
Contents
Downloading animations
First click the "Animations" tab (1) at the top, then type the name of the animation you are looking for into the search bar (2) (in our case it is "Idle"). On the left side on the window you can now select an animation you like (3) and on the right side you can see it applied to your character. You can also configure the animation using controls on the right (4). Once you have found and configured an animation you like, click the "Download" button (5) on the right.

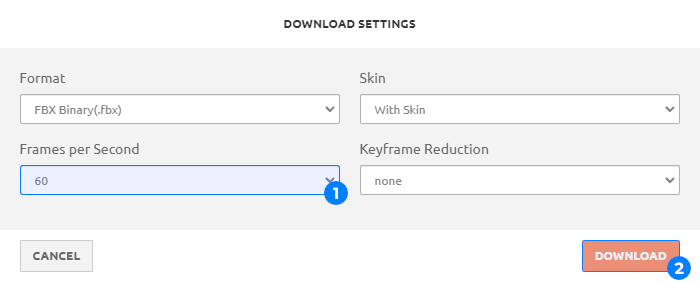
This opens a window where you can further configure download settings. We leave
these as they are and only change the "Frames per Second" option (1) to 60,
then click the "Download" button (2) to download the character with the animation
applied.
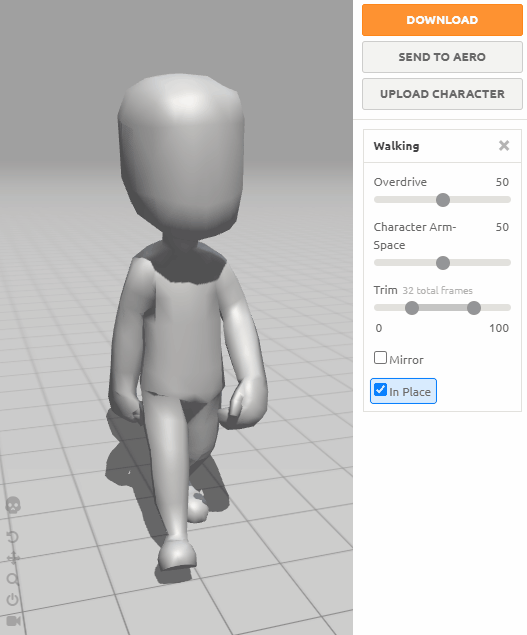
Repeat this process with as many animations as you like. For some animations (like walking) you will want to check the "In Place" option on the right to prevent the character from moving out of the origin:
Combining animations into a single file
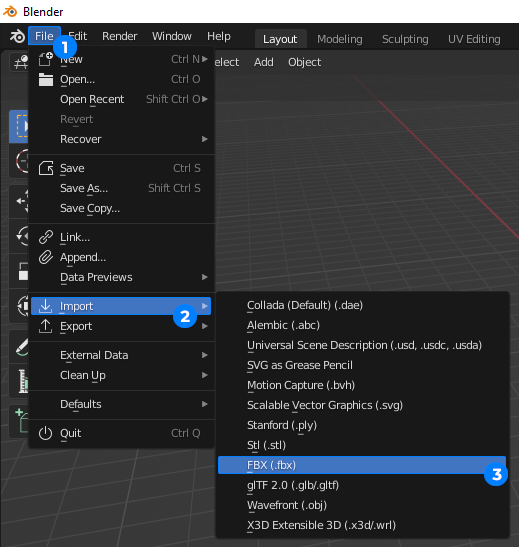
When you have downloaded all animations you like, we can go back to Blender and
combine them into a single file, which is required by BBMOD model conversion
tools (both CLI and GUI). In Blender, select File > Import > FBX from the
top menu.
In the window that opens simply navigate to the directory where you have downloaded
the animations to and select all of them (1). On the rights side of the window,
scroll to the "Transform" section and set "Scale" (2) to 100. Continue by click
the "Import FBX" button (3).

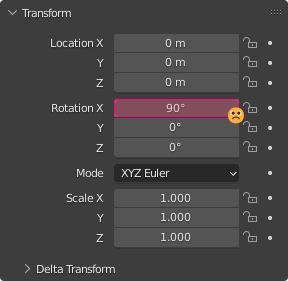
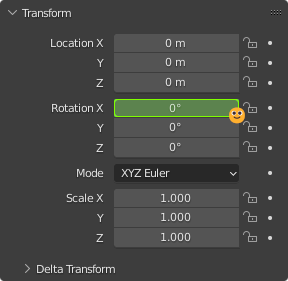
When the import is finished, select all of the imported models by pressing the
A key and have a look on the right side of the window, where you can find
the "Transform" section. "Location" and "Rotation" should be all equal to 0
and "Scale" to 1, but it can happen that the models are rotated on some axes:
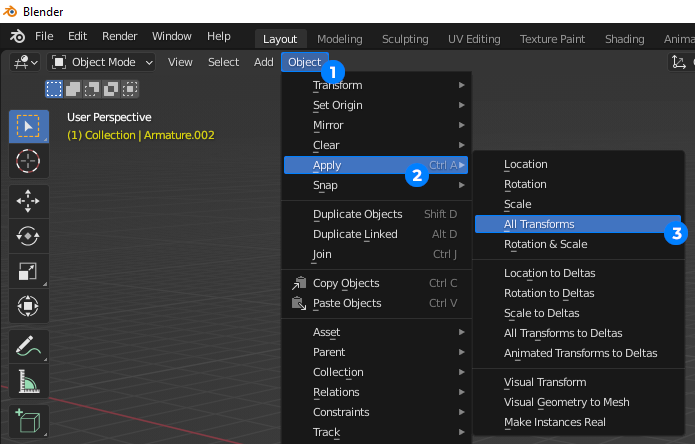
To fix this, select Object > Apply > All Transforms from the menu at the
top of the viewport:
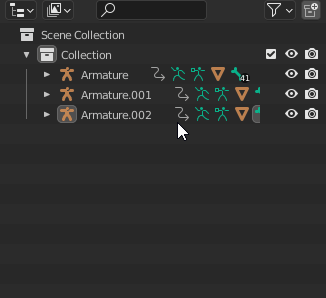
At the top right corner of Blender you should see a "Scene Collection" with
as many armatures as you have imported animations. Hold Shift and left click
on all except the first one and right click to open up a menu, then select
"Delete Hierarchy" to delete those.
Now you can select the "Animation" tab at the top of the window to switch to animation layout:

Make sure your armature is selected:
At the bottom left of the window there should be a dropdown that currently says
Dope Sheet, change it to Action Editor (1) and then a new dropdown with
text similar to "Armature|mixamo.com|Layer0" (2) should appear to the right of
it.
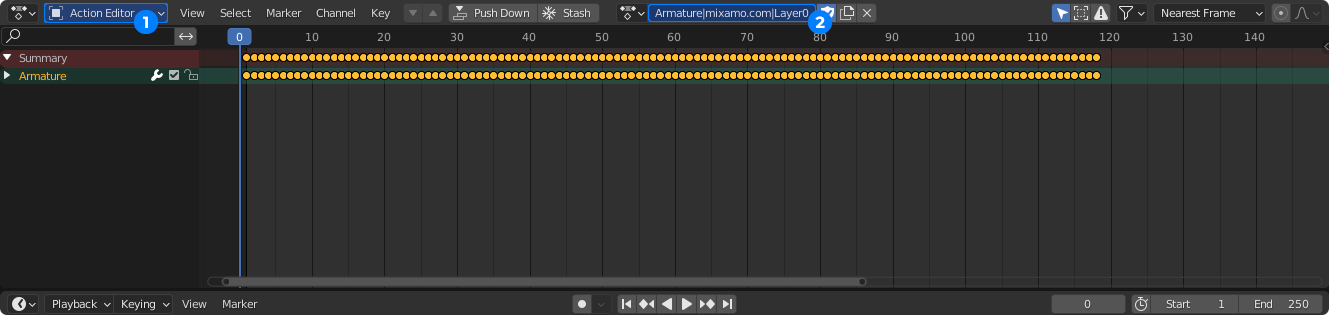
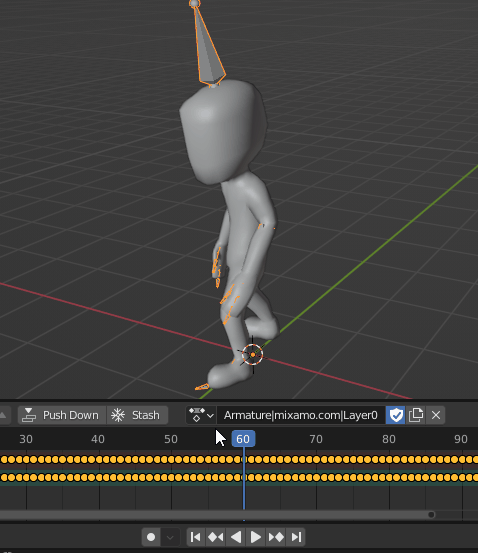
These are actually the loaded animations, they just do not have the original names. You can click through these and play them using the buttons at the bottom:
Once you make sense out of which animation is which, you can give them proper
names, which will be used in the filenames when we convert the character to BBMOD.
Simply click on the animation name, type a new one and press Enter:

Exporting from Blender
When we have our animations ready, we can export the character from Blender again.
BBMOD model converters (both CLI and GUI) utilize Assimp,
which supports many different file formats, including FBX, COLLADA, glTF
and even .blend files. There are virtually no advantages to use one over
another when converting them to BBMOD (except that some may be better supported
by Assimp), so you can pick any you like. We prefer FBX, as it is currently
the standard in many game engines. To export an FBX from Blender, select
File > Export > FBX from the top menu bar.
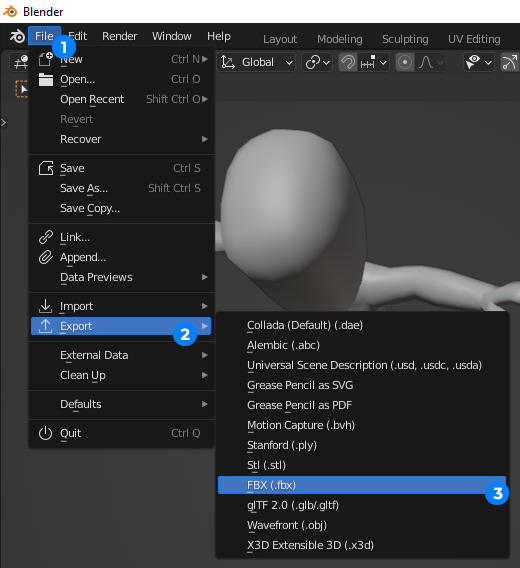
In the window that opens navigate to the directory where you would like to save
the file to and give it a name you like (1), we will be using Character.fbx.
On The right side of the window scroll to the "Transform" section and change
option "Forward" to -X Forward and "Up" to -Z Up (2). These two usually work
for most models. If your models appear flipped in GameMaker, you will
need to configure these until they are right! Continue by pressing the "Export
FBX" button (3).

Your character now has motion-captured animations and it is fully prepared for conversion into the BBMOD file format!